
Tour Divide Packing List, part 1

Tour Divide Bike
The carbon, rubber, cloth, plastic, and more that made this bike possible
This is the first entry of a two part series on packing for Tour Divide. This entry covers the bike itself and all the hardware associated with it. The next entry looks at the bags I chose and what I packed into each one. To skip straight to that entry, click here.
Preparation for my 2023 Tour Divide started in the middle of 2022. Over the next many months, right up to the very moment the race rolled out in Banff, any moment of free time was filled with dialing in the hard goods and soft goods to make my inaugural TD run smoothly. I would be remiss if I didn’t immediately point out that I did not finish this first attempt. It’s now a few weeks after the grand depart and I’m already scheming how to make things operate even more smoothly if I am to tackle the Great Divide route again. Only time will tell.
This list serves as a template, not the hard and fast bible on what you should bring. I reached out to a lot of other people with much more experience about how they did it, what they packed, what worked for them, what didn’t work, and so forth. I am thankful to everyone who was so helpful in offering their insight. That’s been a massive takeaway; the camaraderie and fellowship among the bikepacking community is rich. Riders sharing their knowledge with one another to lift each other up. It’s refreshing.
Let’s go!
The Bike itself:

As seen above, I opted for a Cannondale Scalpel HT Carbon 2. This is a beauty of a bike and my only regret is how much superficial damage it received courtesy of all the muddy wear-and-tear from bags strapped to all corners of this handsome rig. Speaking of that, I did a fair amount of due diligence on how to protect a frame from this very thing. Turns out the tape used to protect helicopter blades is super lightweight, durable, and the go-to for many. I actually used it, but only directly under the straps. A better move would be to drape the tape on every inch of the bike. Lesson learned.
In choosing the type of bike, I have full suspension mountain bikes at my disposal, gravel bikes of all kinds including a Topstone with the Kingpin rear “suspension”, but after talking with lots of experienced riders about the ideal type of bike, a hardtail mountain bike is the way to go.
This bike traditionally comes with a Lefty Ocho front shock. I’m as big a fan of this bike as I am of Leftys in general, but because I needed a dynamo power generating hub, it required a traditional fork. Swapping from Ocho to the RockShox SID Ultimate was remarkably simple because there’s no internal routing. Voila, that’s my bike.
For my hind quarters:
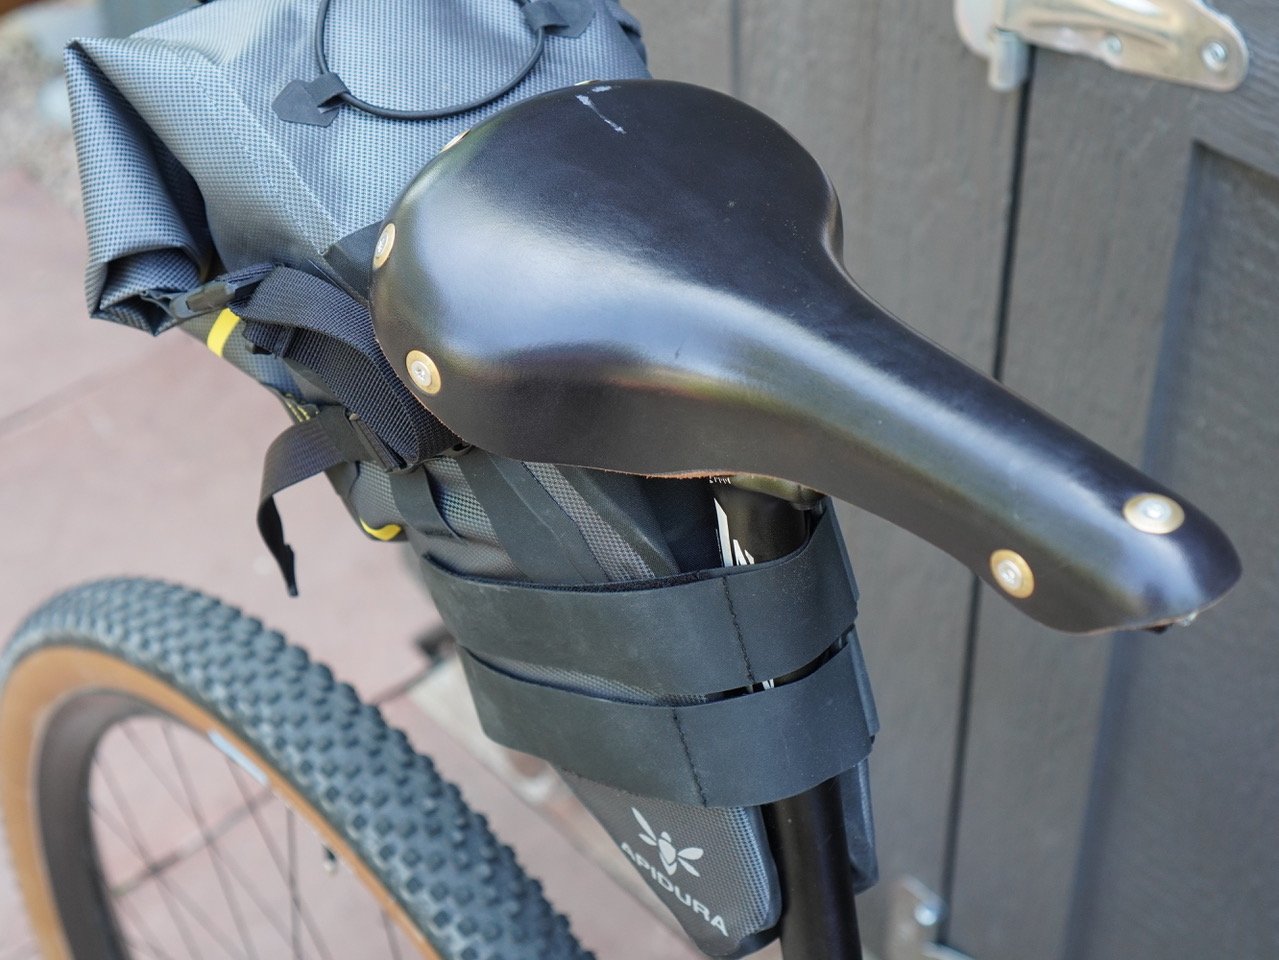

I opted for a Zipp Service Course seatpost because I just figured an aluminum post would survive better than a fancy, lightweight carbon one, especially with weird forces pulling on it due to a heavy saddlebag. A good seatpost is the kind of thing that you want to put into place and never think about again and I hereby safely declare this is a good seatpost.
I’ve used a dozen or more different saddles in my day and Fizik seem to work well for me. Lately I’ve been riding their Tempo Argo on all my bikes, but knowing that this wasn’t just a typically bike ride, I went with the more luxurious Aravis saddle by Berthoud Cycles. Saving weight with titanium rails, within just a few days this saddle felt like a comfy sofa for my sit bones. 10 out of 10 would recommend.
Cockpit:
My Zipp Service Course stem was flipped from it’s normal flat position into the 6 degree raised position. Figuring that 12-20 hours daily on a bike was going to take its toll, therefore being more upright seemed like a good idea. Given that my cockpit was pretty much dialed when I decided to make this flip, it was a touch easier said than done. That being said, this last minute decision is one that I don’t regret.
This bike runs the Truvativ Atmos flat handlebar for its traditional XC use. Around the last minute, I thought it would be nice to have some riser bars, again for a more upright position, but that was too late so I kept the flat bars. These flat bars were fine and I didn’t think much more of it. That said, if you want a more upright position, then riser bars are a worthy consideration.
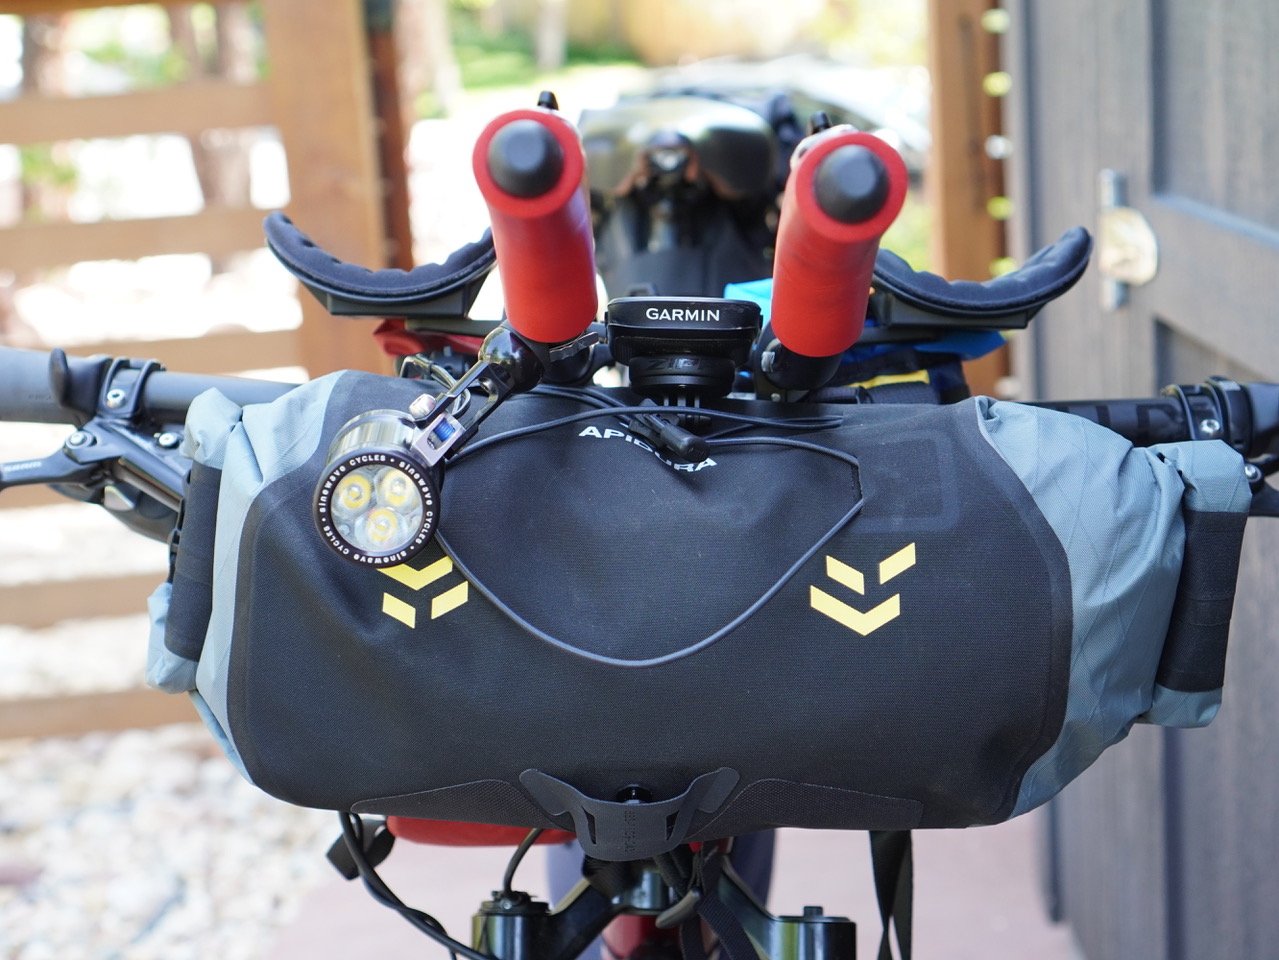
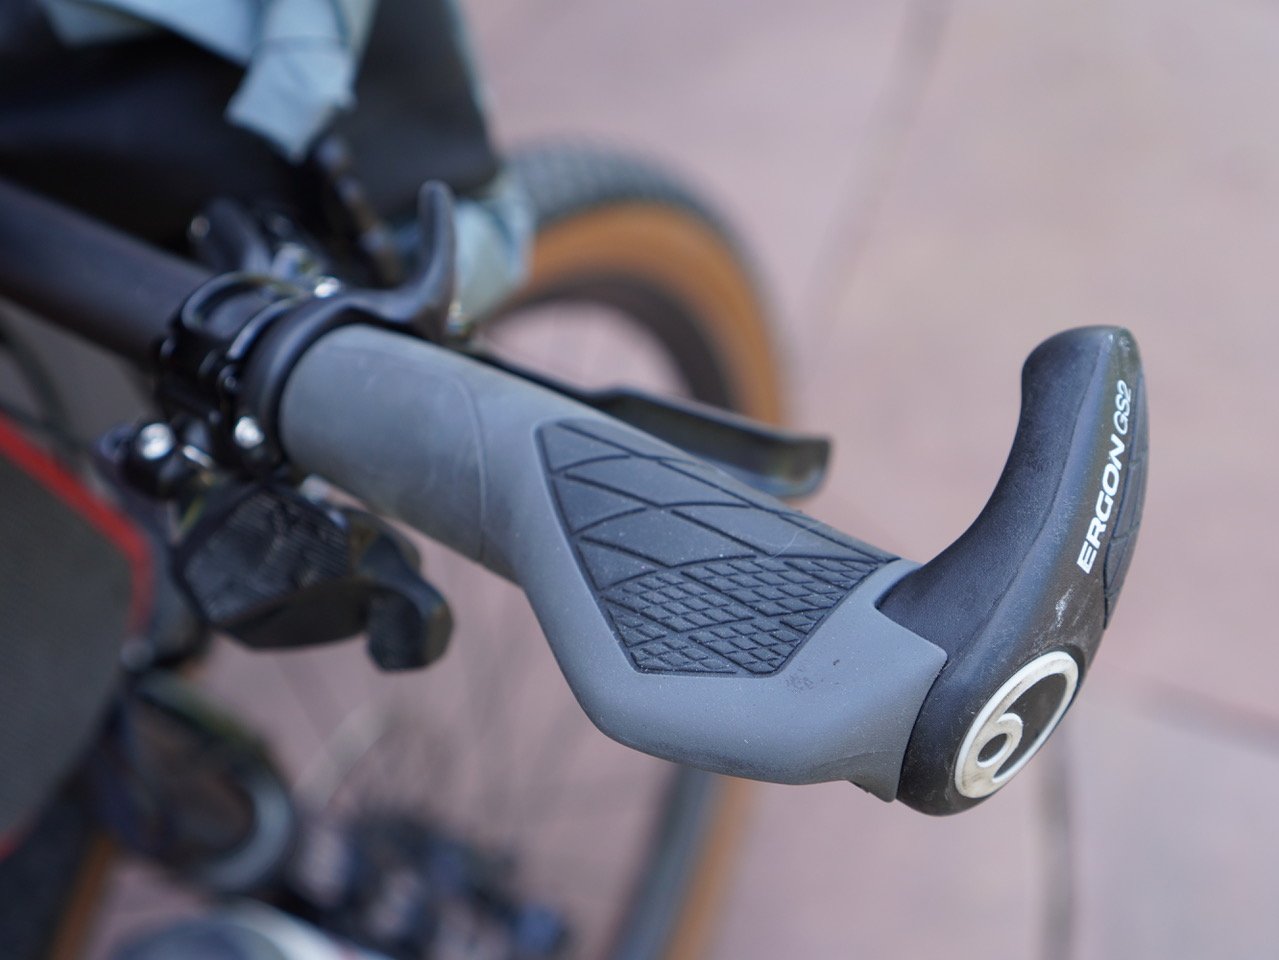
I love my Ergon GP2 grips. They have a comfy, ergonomically fit to the palm of your hand plus they feature bar-ends that were super cool in the 90s and somehow fell off the face of the earth more recently. Don’t let anyone tell you otherwise, bar ends are sweet and so are these grips. In my experience at Arkansas High Country, being stuck in a static position left me with neuropathy of the hands for a solid six months. That sucked. I suggest having as many hand positions as possible.
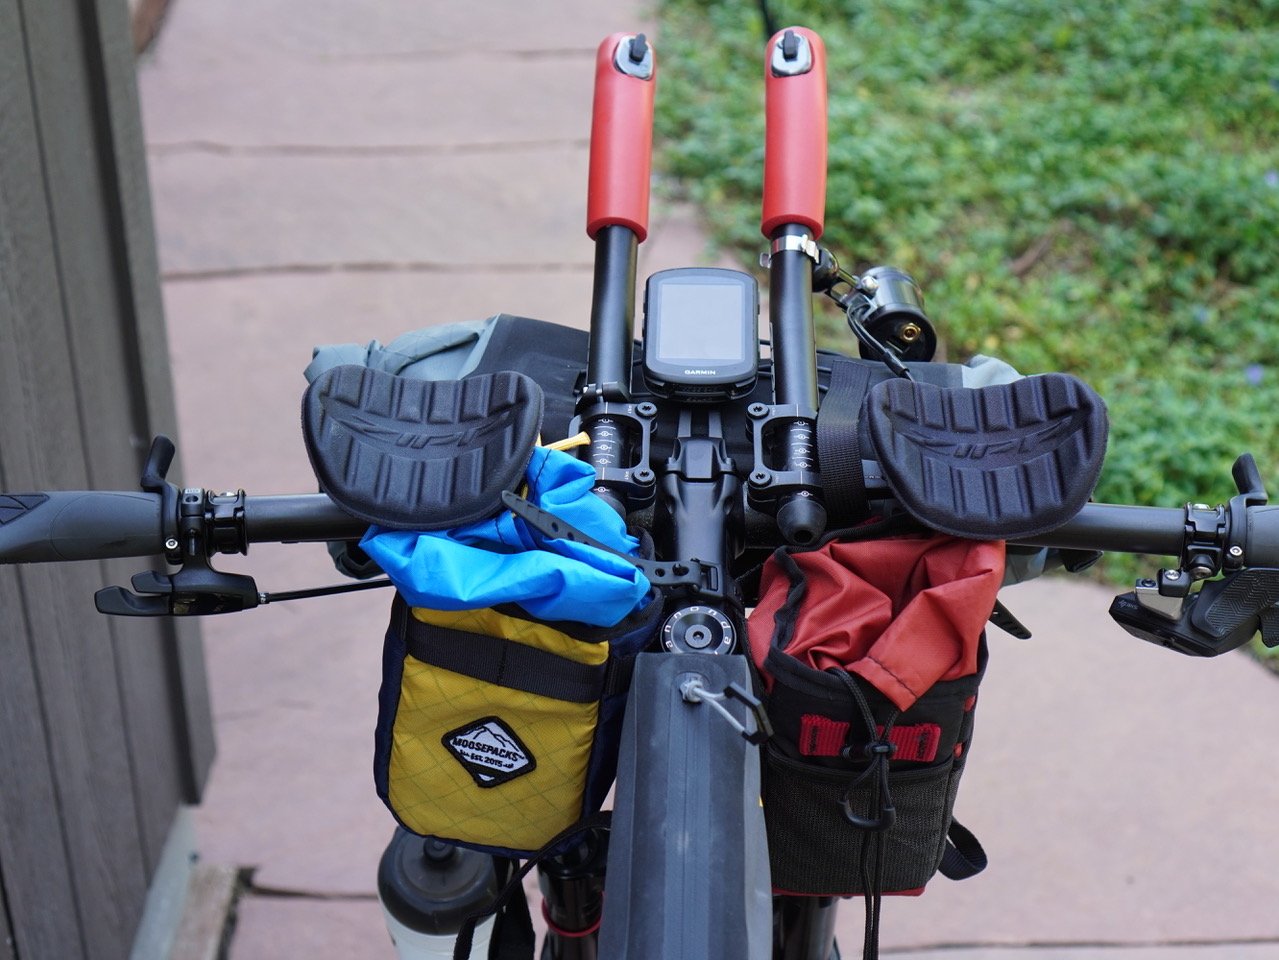
Along the same lines, I used Togs to mix things up. I find these tremendously helpful when looking for slightly different hand positions.
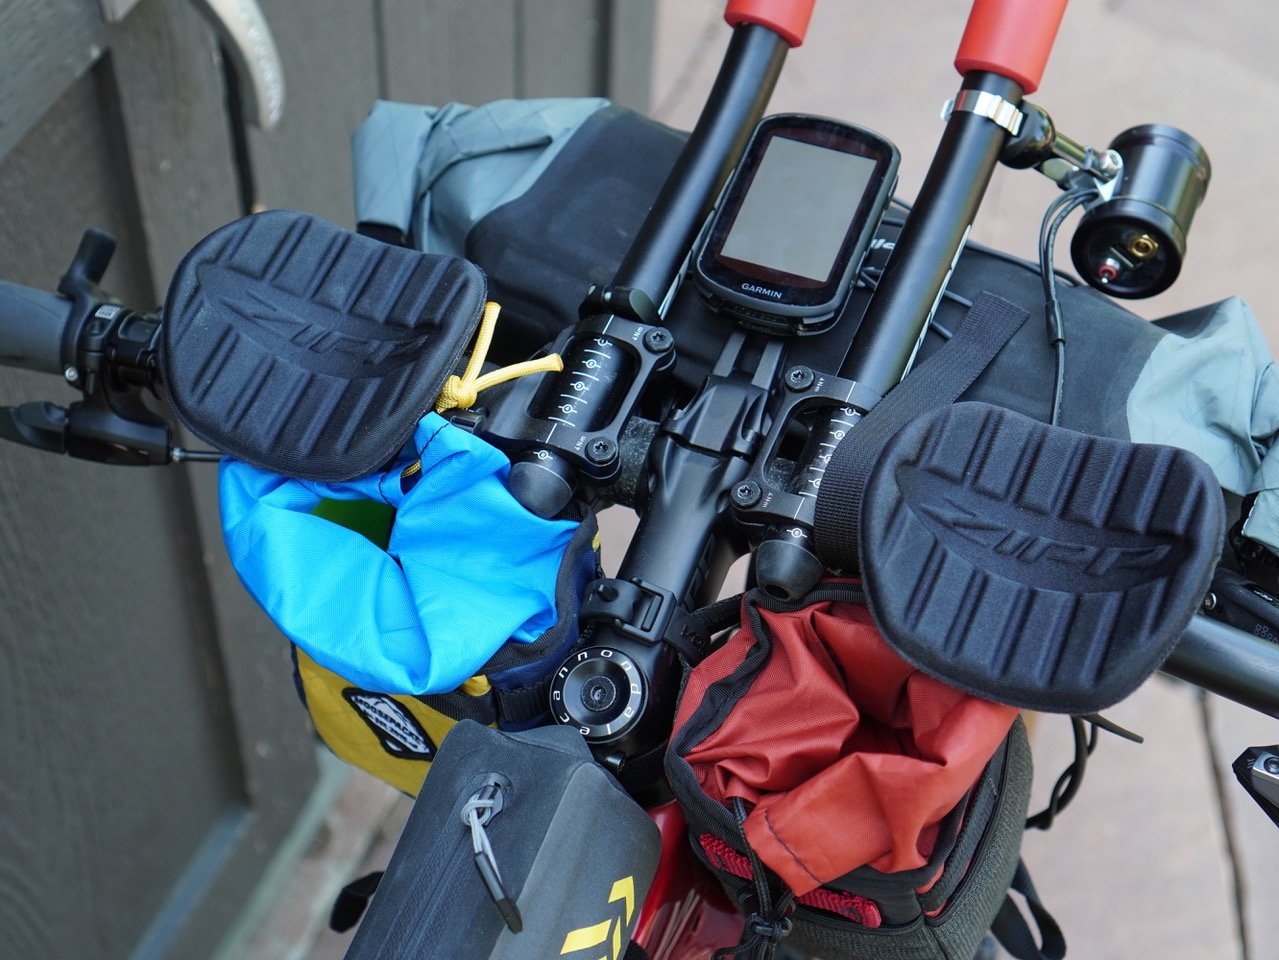
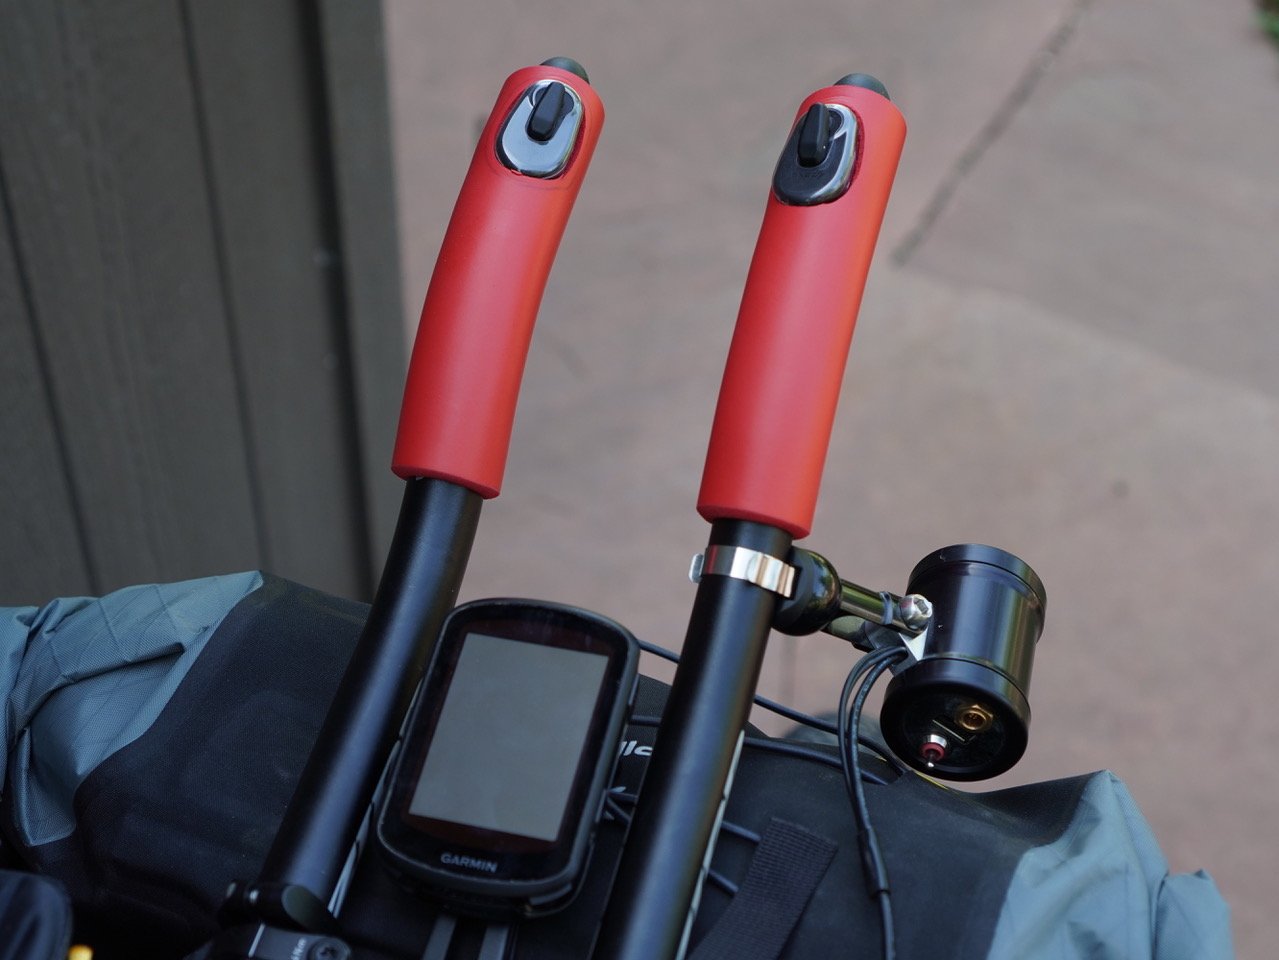
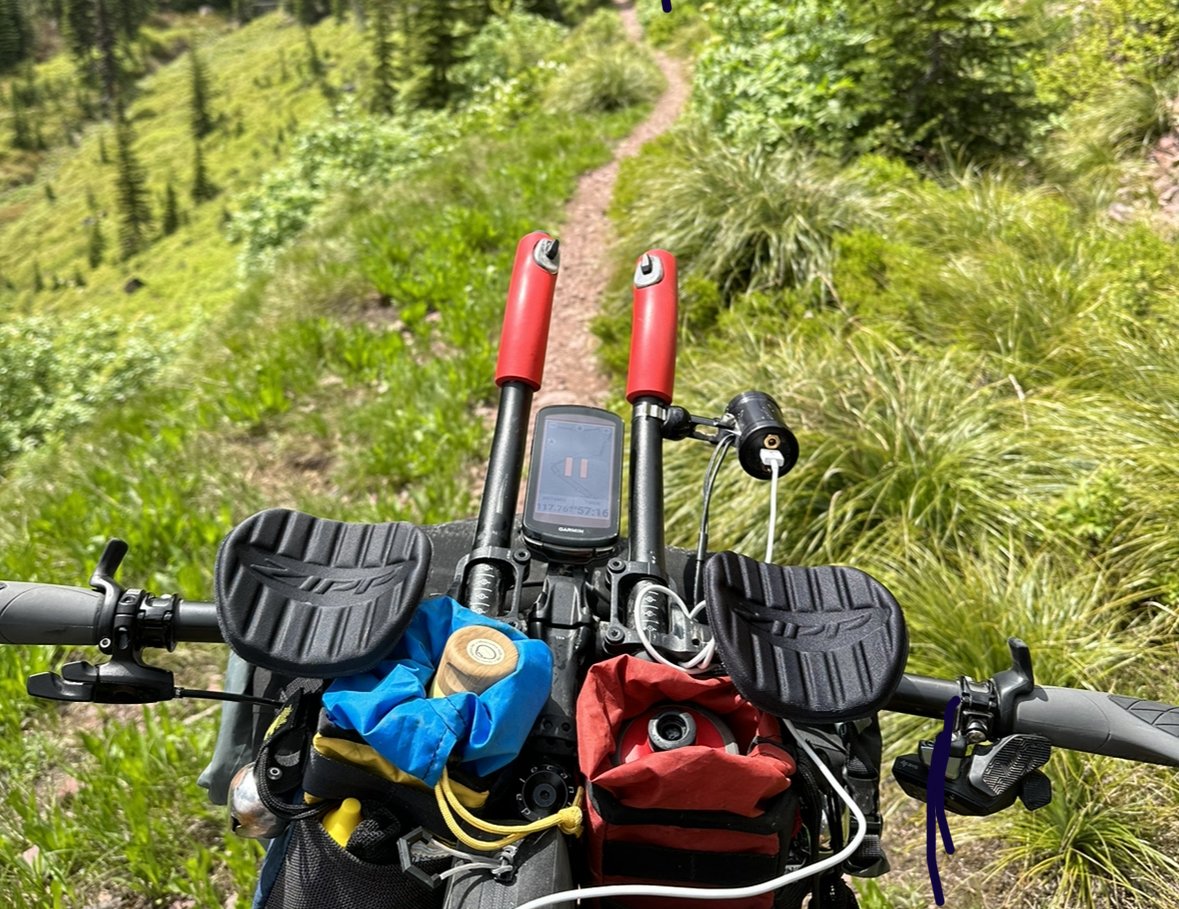
Nothing says aesthetically displeasing like TT bars on a mountain bike. Welcome to long distance bikepacking! Zipp is my aero bar of choice and I went with the Vuka Alumina clip-ons. From there I bought some $8 handlebar grips on Amazon and then my friend and SRAM mechanic Anna deftly cut out just the right sized hole to insert SRAM eTap AXS Wireless Blips so that I could shift while in the aero position. You can’t help but feel like you’re in the UCI time trial world championships while riding a 50lb bike at 12mph.
Drivetain:
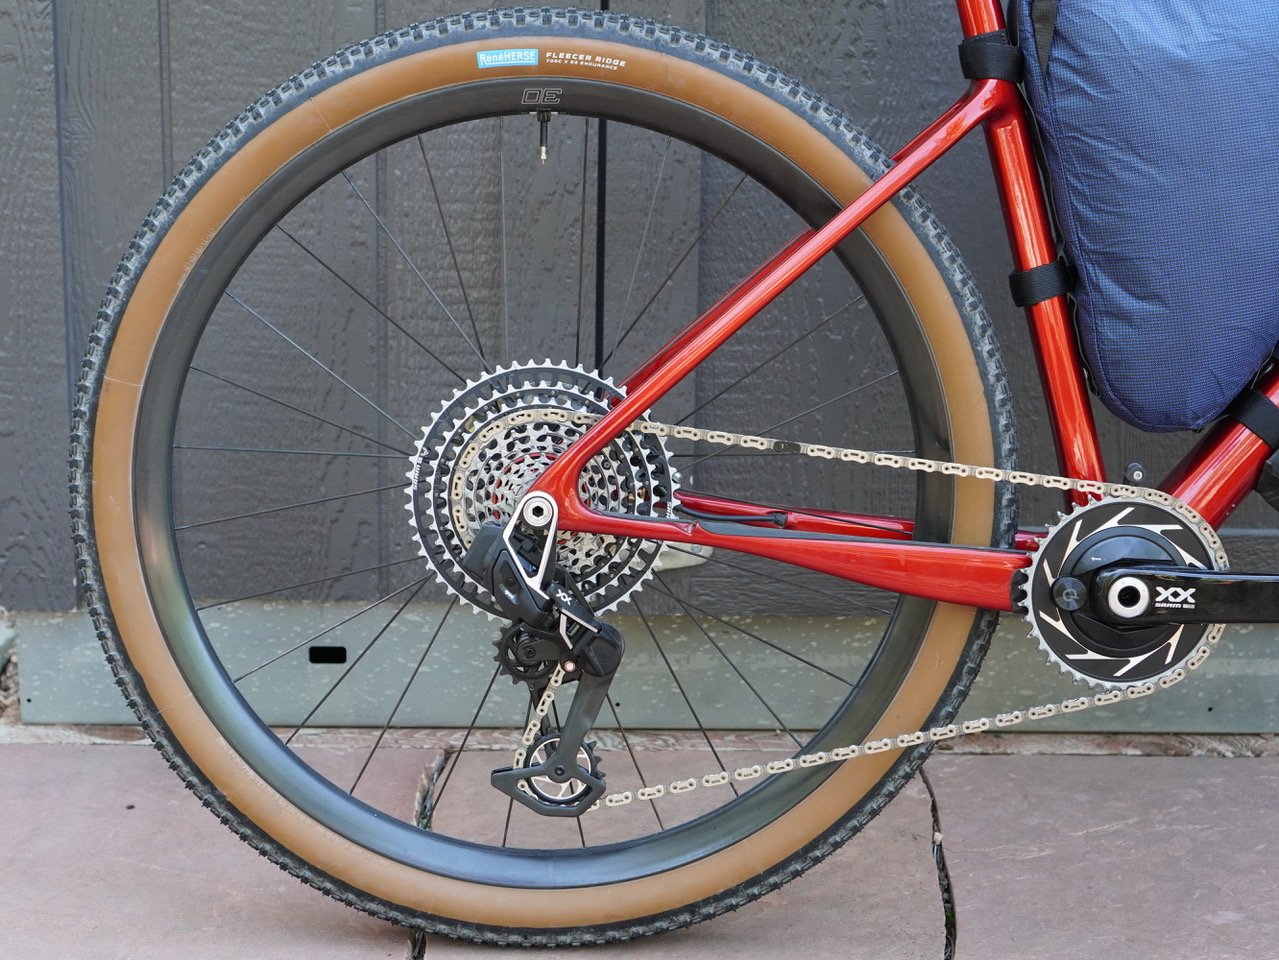
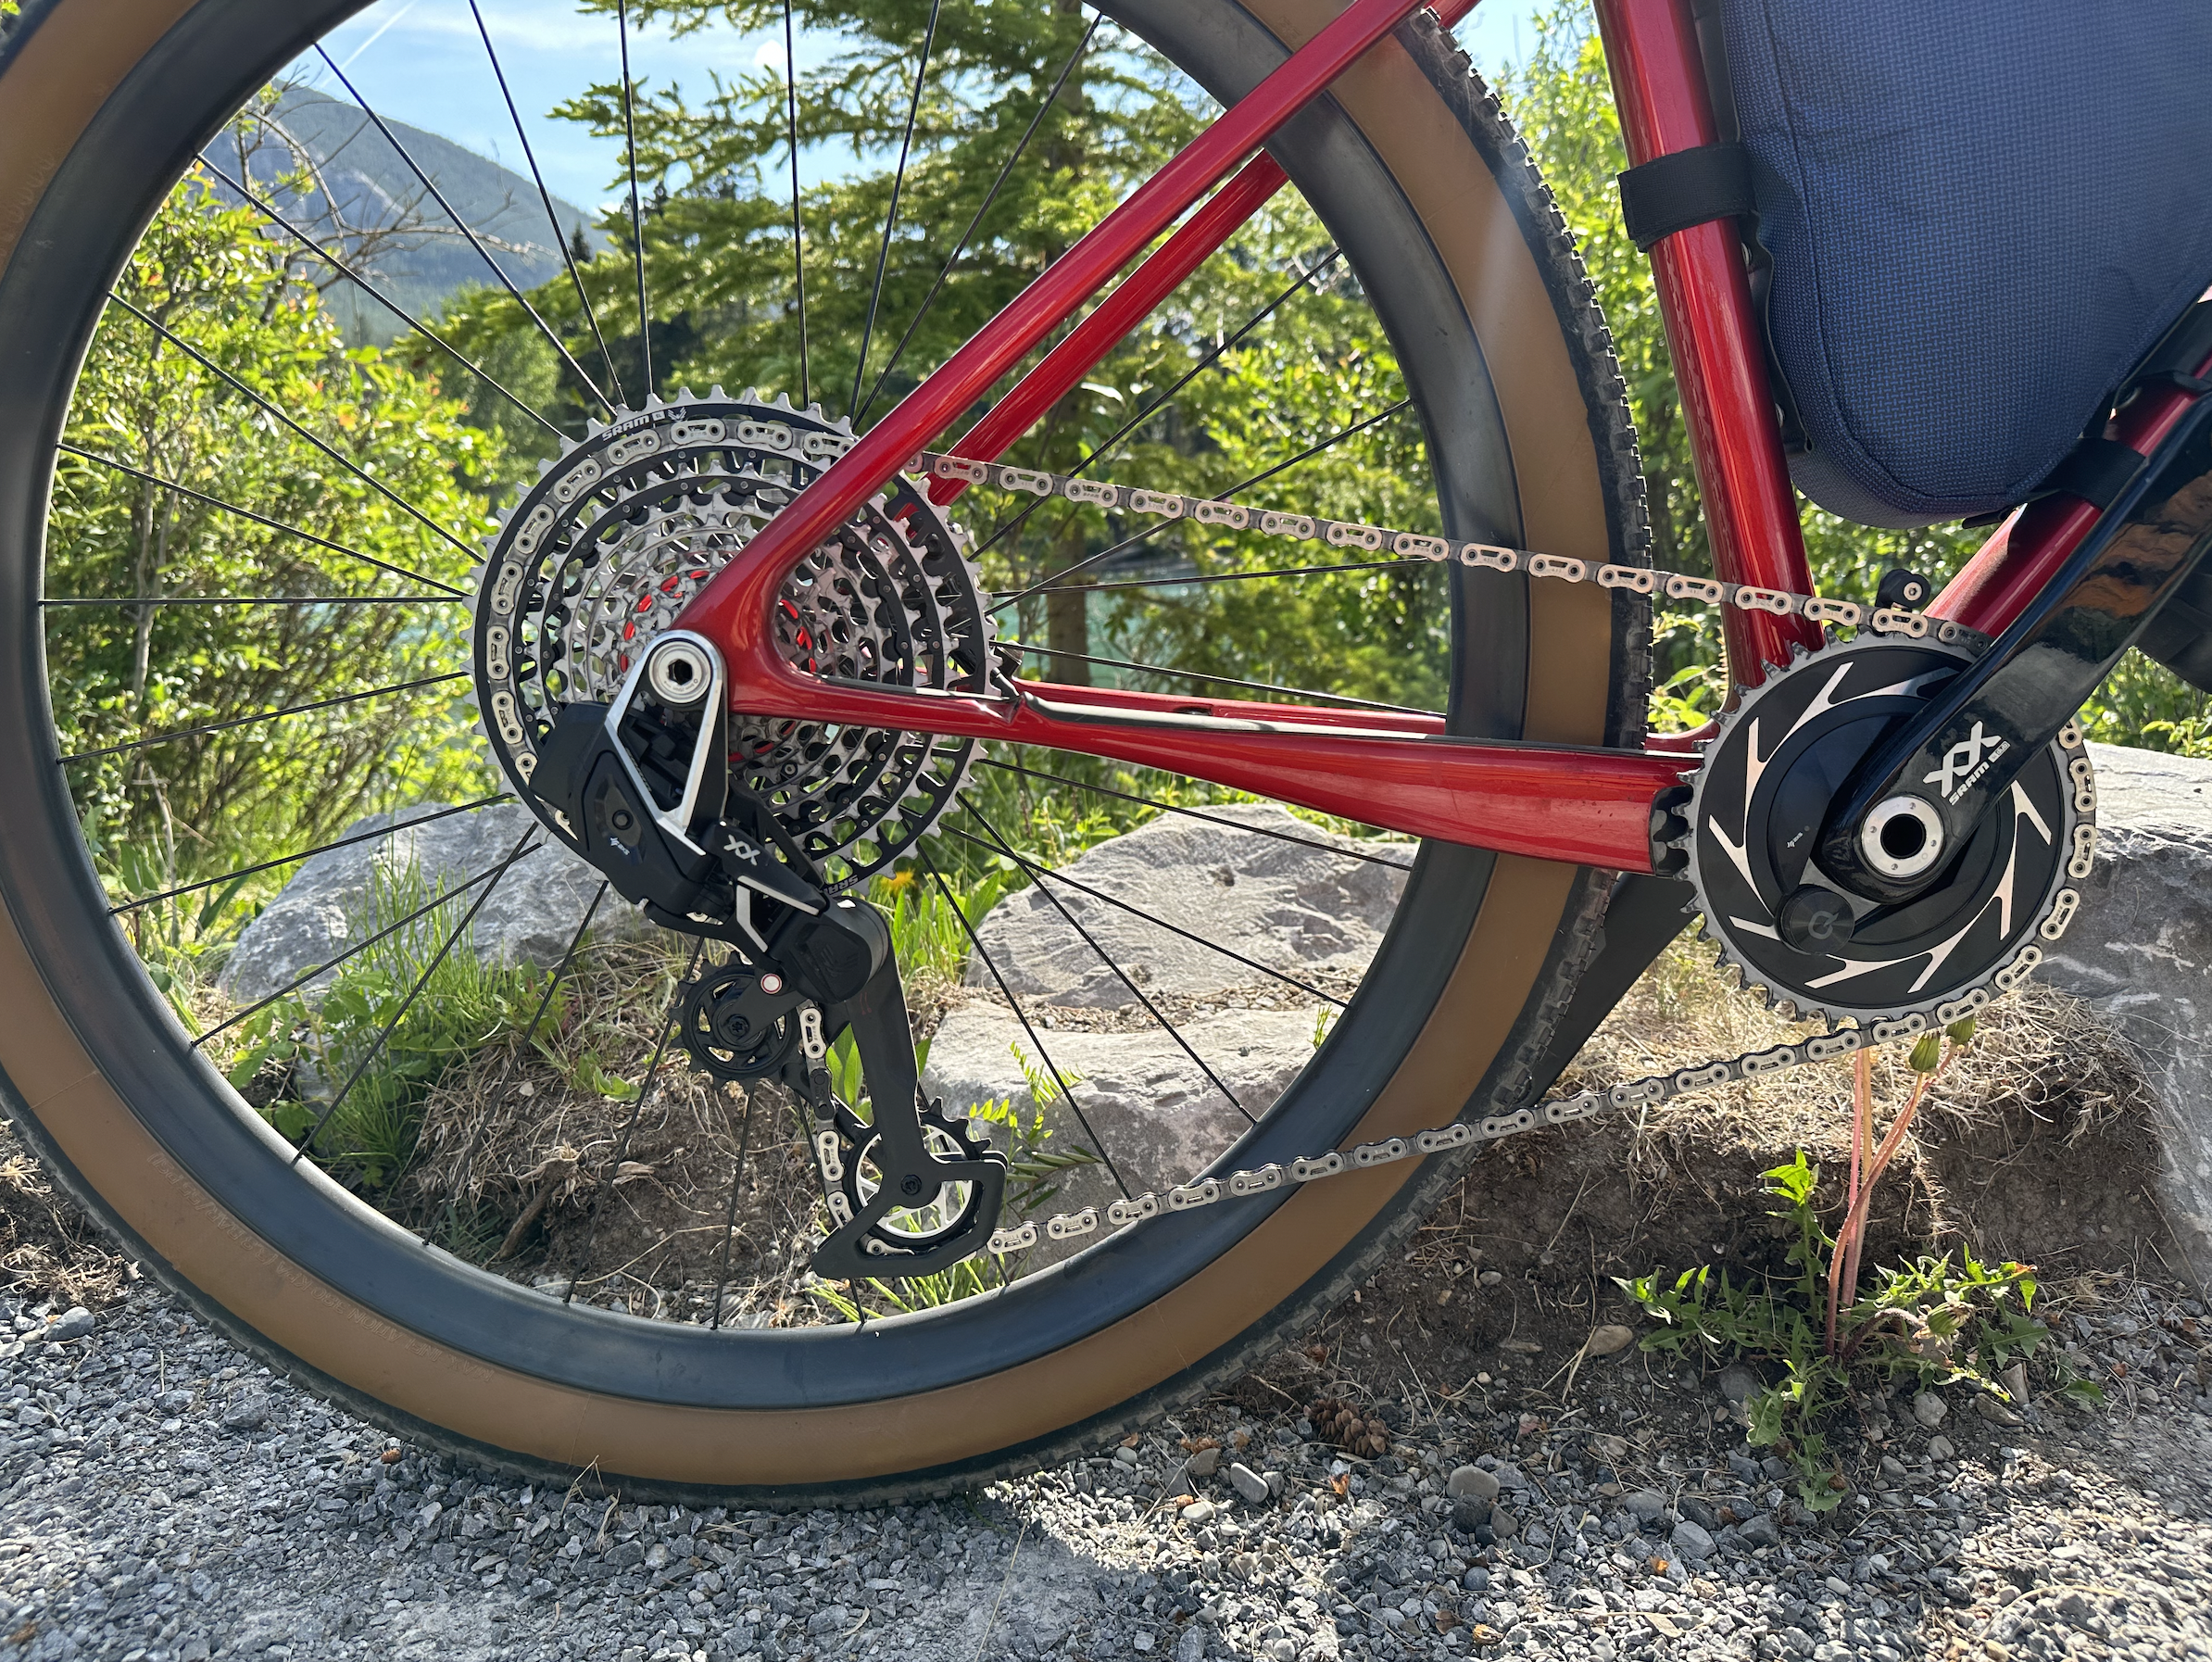

It’s instrumental that the entire bike be rugged. Based on videos circling the internet of people stomping on this new derailleur, the SRAM Transmission Eagle drivetrain is seemingly indestructible. I don’t plan to stand on my rear derailleur, but it’s reassuring to know it’ll survive if the bike fell drive-side down. A 10-50 cassette was out back and I went with a 38 tooth ring up front. I typically run a 36t and went with a 38t thinking that it’s a long, rolling, dieseling course, but early on I realized that there are plenty of 10-20% grades, therefore churning out the power on a heavy, loaded bike is a doozy. Having an extra gear is smarter than having too few. Next time run 36t or even 34t.
2023 marks the first time that I’ve run power on my mountain bikes thanks to SRAM power meters. Necessary? Naw. It’s more for curiosity than any sort of training benefit. For the long haul ride, I think it’s certainly interesting to have this data.
Look’s X-Track Carbon-Ti pedals were a sleek way to keep the bike lean and spritely.
Wheels, Tires, and Power System:
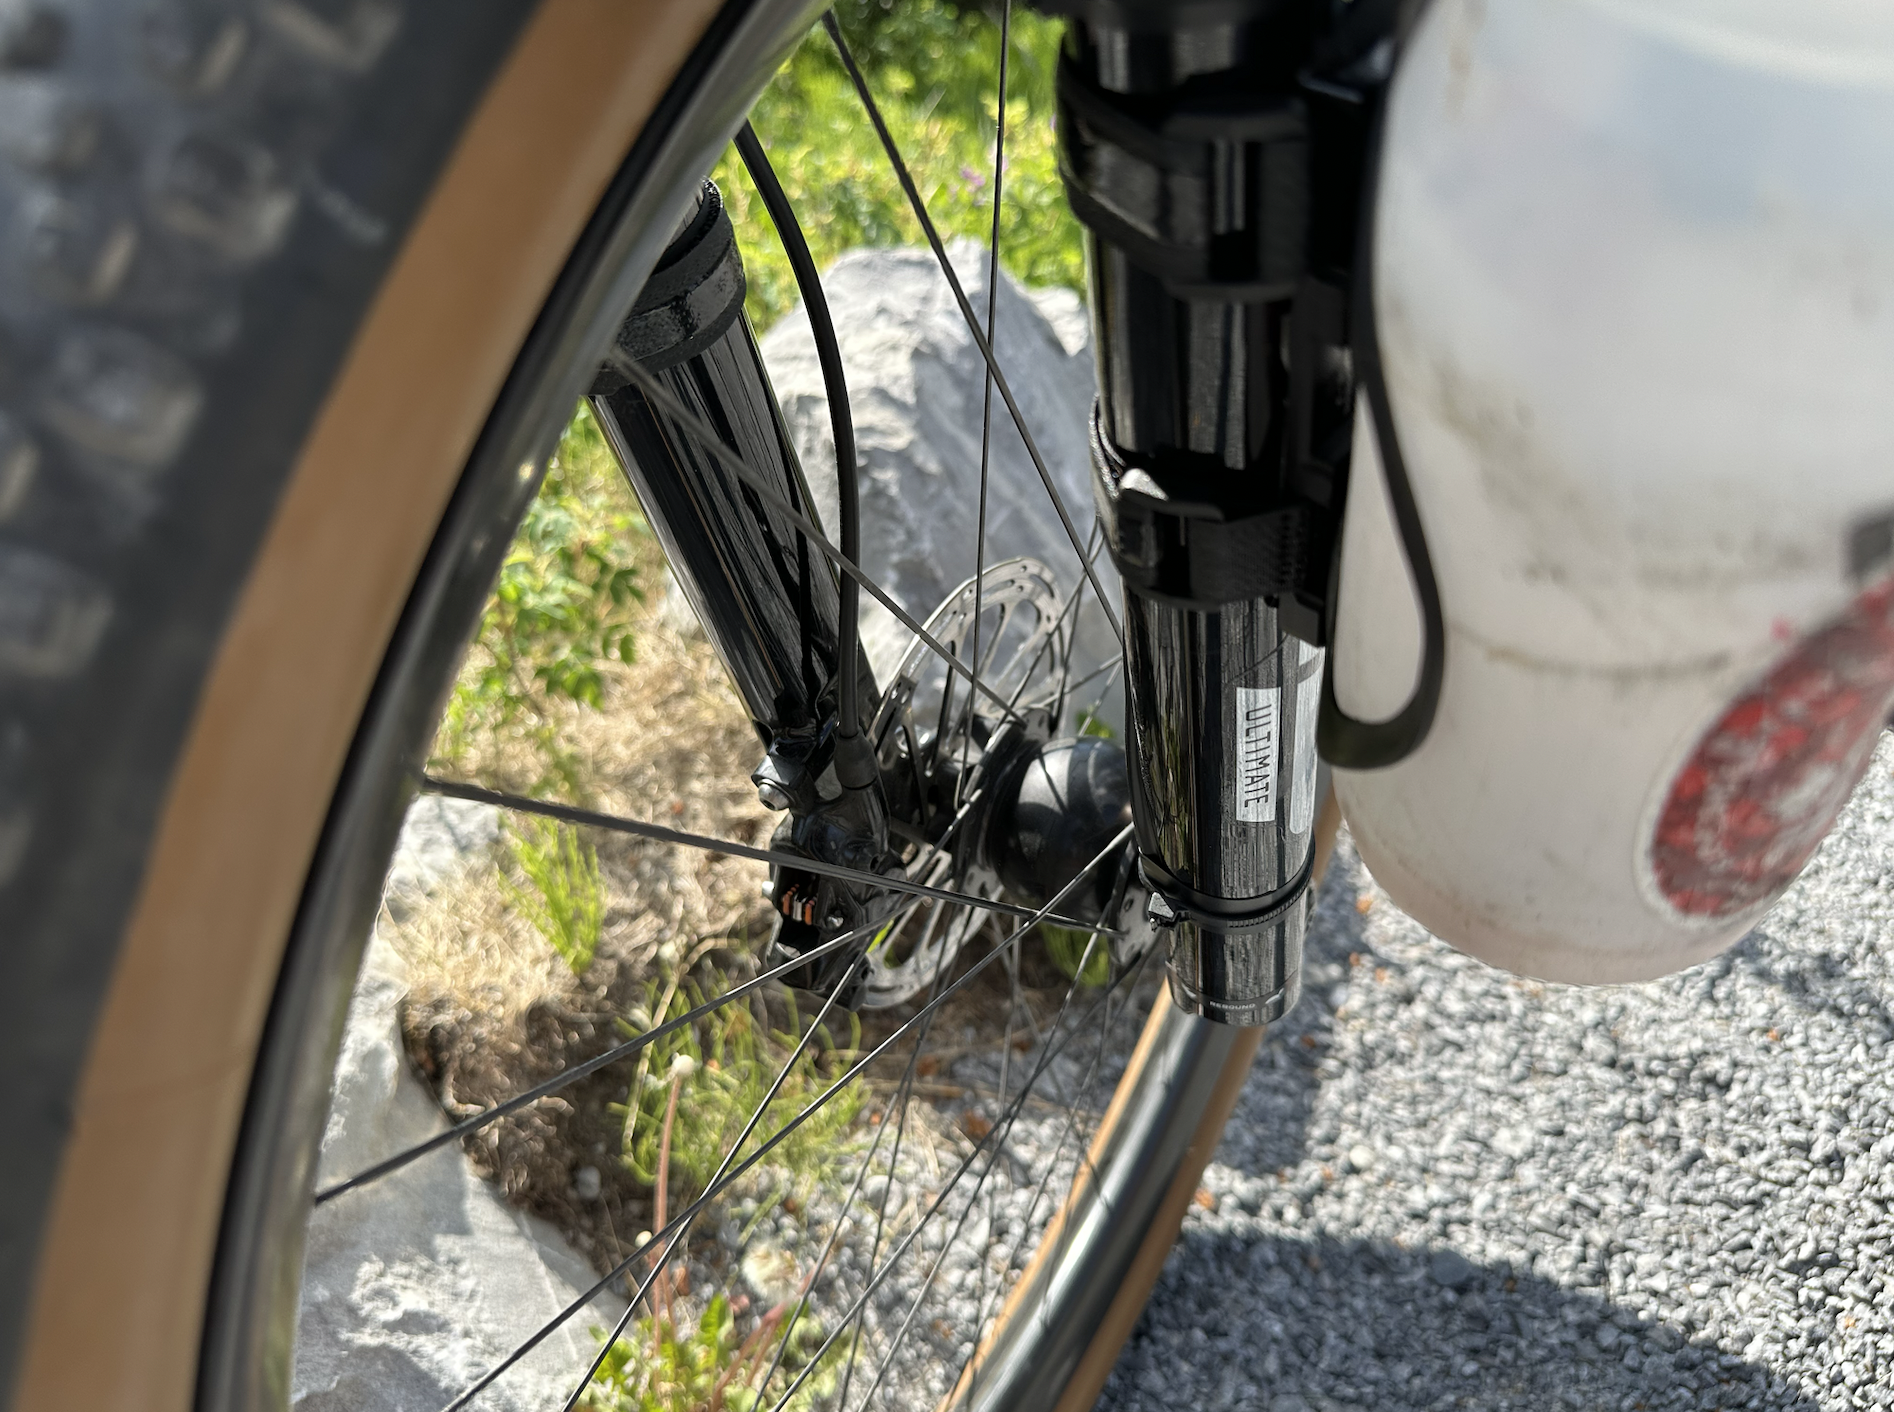
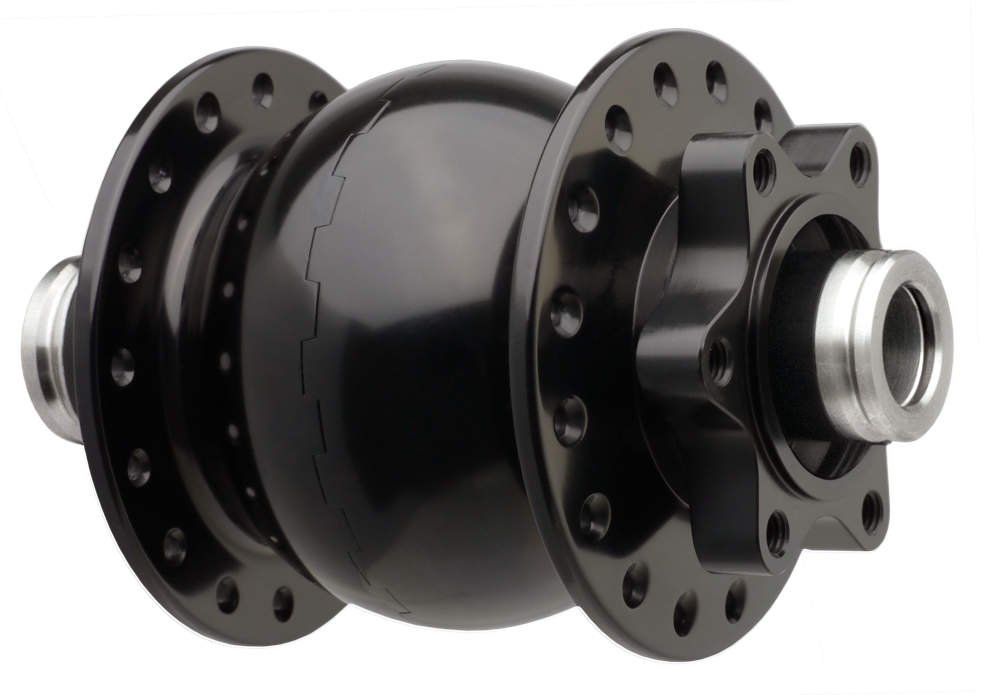
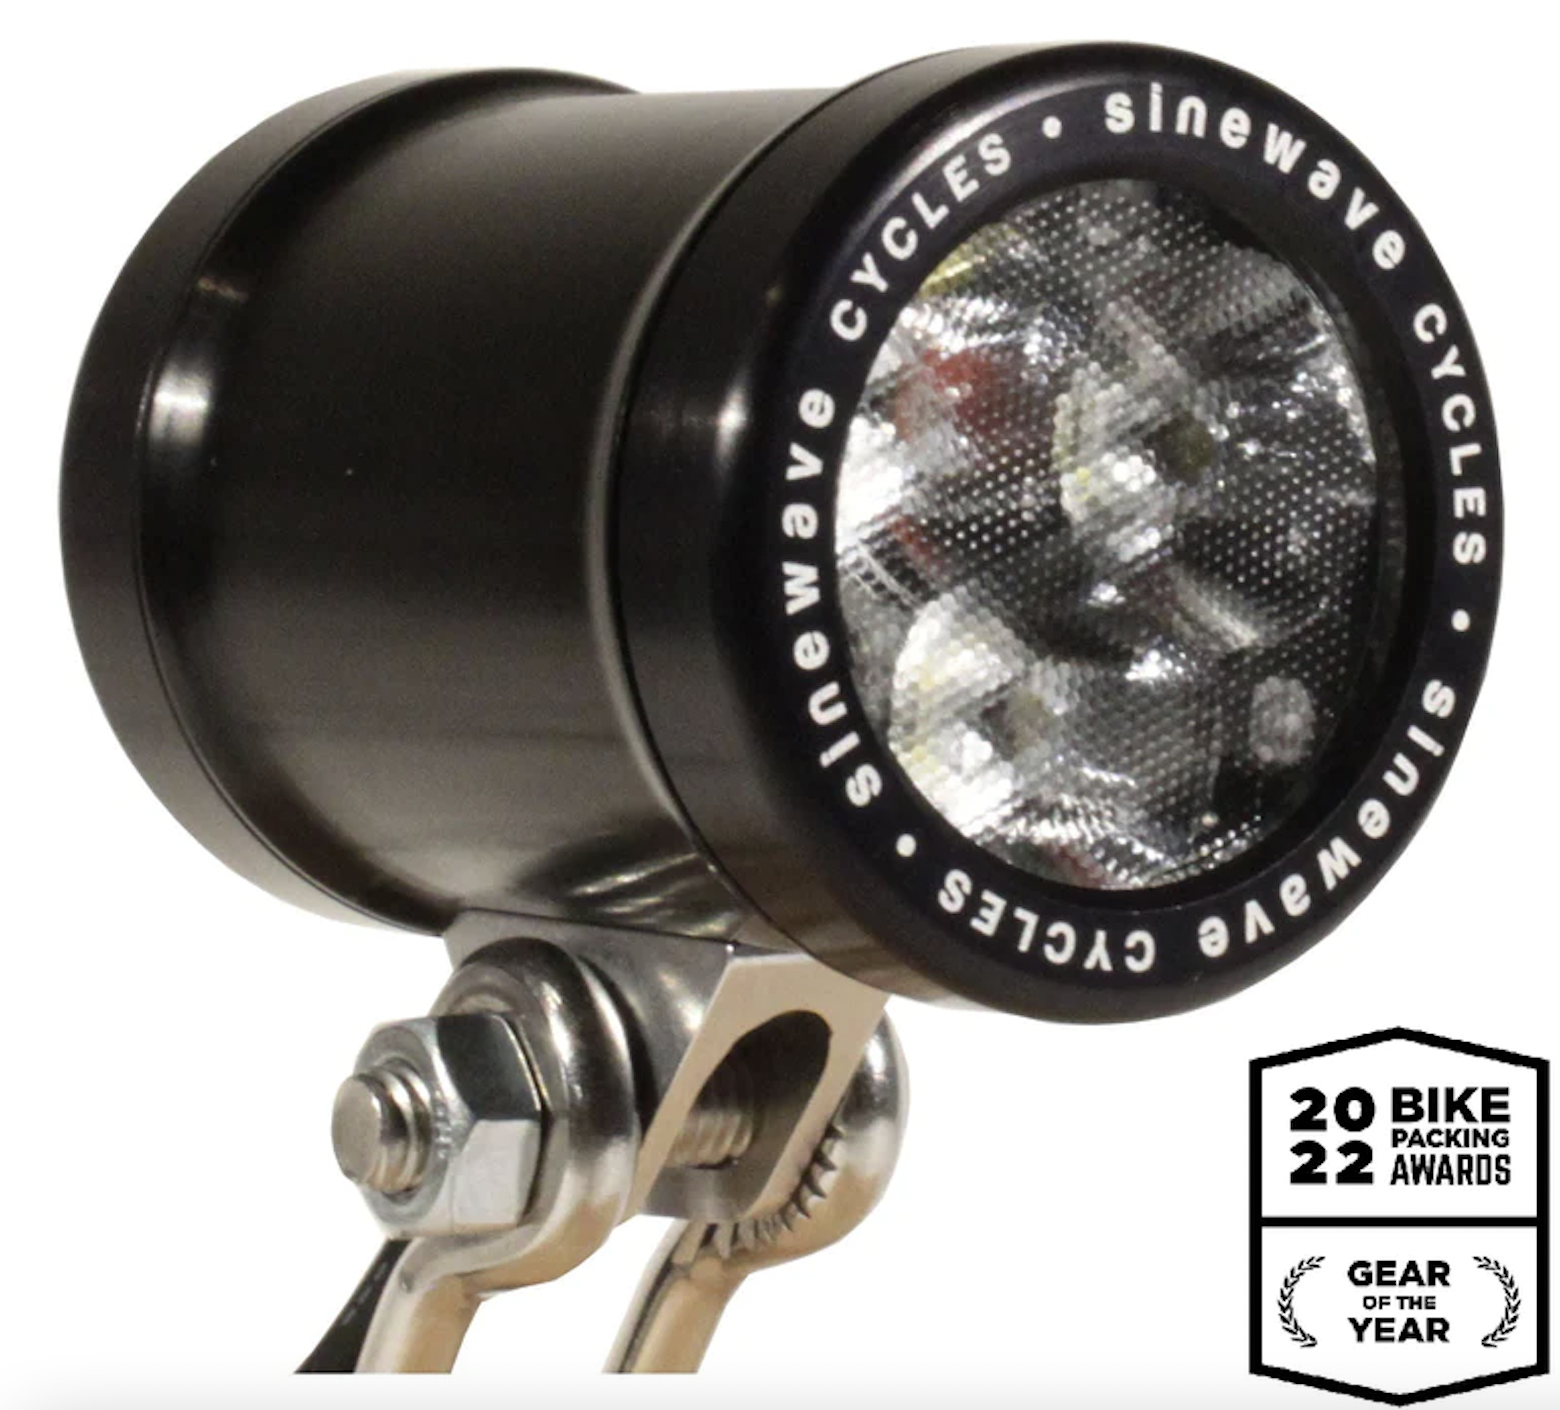
Wheels are a bit of a trick because I wanted 28 hole spoke count rim rather than the racy and light (and delicate and seemingly much more common) 24 hole rim. Furthermore, getting the right spoke count is key to fit a Dynamo Hub. After an absurd amount of deliberation and conversation, I ended up with a Son 12x 110 Boost, six bolt hub. I paired that with a Sinewave Beacon II light, which provides a USB outlet for charging electronics. Is it the best thing ever? Probably not, but you can’t help but feel like a magician charging electronics from your bike.
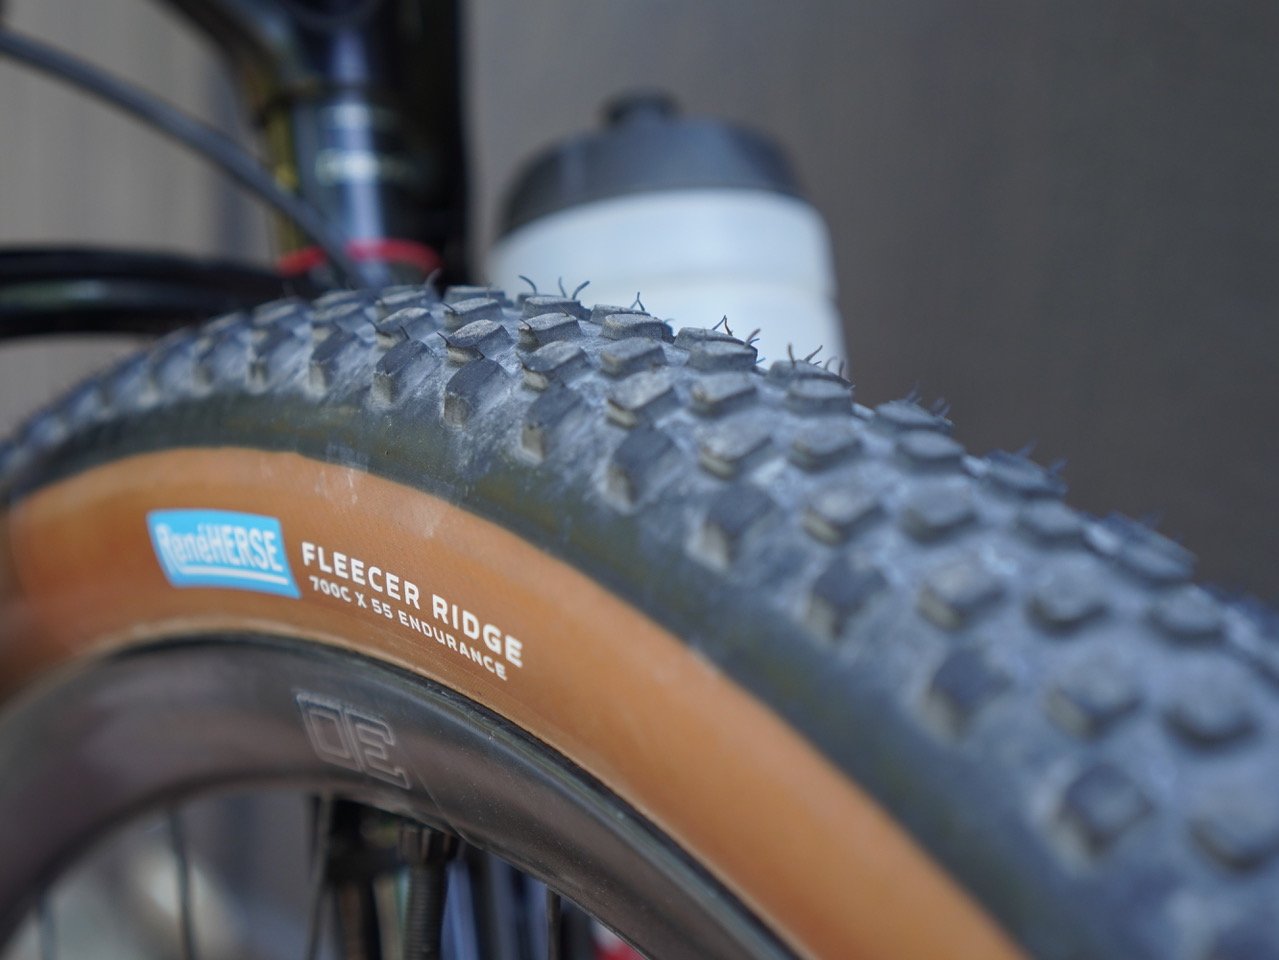
Rene Herse Fleecer Ridge tires are the rubber of choice for Tour Divide. Period. Their endurance casing offers a bit more protection so that you’re not trailside fixing flats every other day. 700x55 (or 29” x 2.2”) is plenty of tire when you need it and never feels like you’re bogged down on a heavy tread. Absolutely would ride these again.
Other Odds and Ends:


The above is a combination portrait + self-portrait by Hazel. I’ve only ever seen Hazel color aggressively with a liberal interpretation for the term “inside the lines”, so when she drew mom, her brother Hayden, and herself so that I could take them with me on my ride, I was verklempt.
Despite there being some 76,000 options for GPS mounts on the market, it was surprising how long it took to find the right one. Free real estate on the handlebars for a mount is at a premium in the first place, so I was often looking at side mounted clips that attached to the aerobars rather than the handlebars, but those mounts weren’t centered and they seem a touch too finicky to stay in place. Additionally, a mount can’t dip too far below the handlebars because that would interfere with your handlebar bag. So with more consideration than I imagined possible, I landed on this badboy. It’s a Zipp product and specific to the bolt dimensions of my Service Course stem. It works like a charm.
As my friend Roger likes to joke, “Bear spray is for the bears; it’s not sprayed on you as a repellent.” With dad jokes this good, it’s no wonder he’s a dad four-times over! You can’t fly with bear spray, but it’s easy to purchase once you land in Alberta. Bear spray is meant to be administered quickly so don’t let it be an afterthought where you’ll end up putting it on your bike. I talked with Chuck who founded and runs Bearclaw bear spray Holster, a 3D printing company for lightweight, easy to deploy bear spray. I suggest you check them out.
I run a Garmin 1040 Solar as my primary computer in the aforementioned computer mount and I had an 840 Solar as a backup. Lots of people told me to have a backup. Do you need two GPSes? Probably not, but it’s not the worst idea either. That turned out to be an expensive proposition, however, when I discovering that the 840 had ejected itself from its safe perch inside a pouch on my bike after a particularly bumpy descent. Clearly not safe enough.
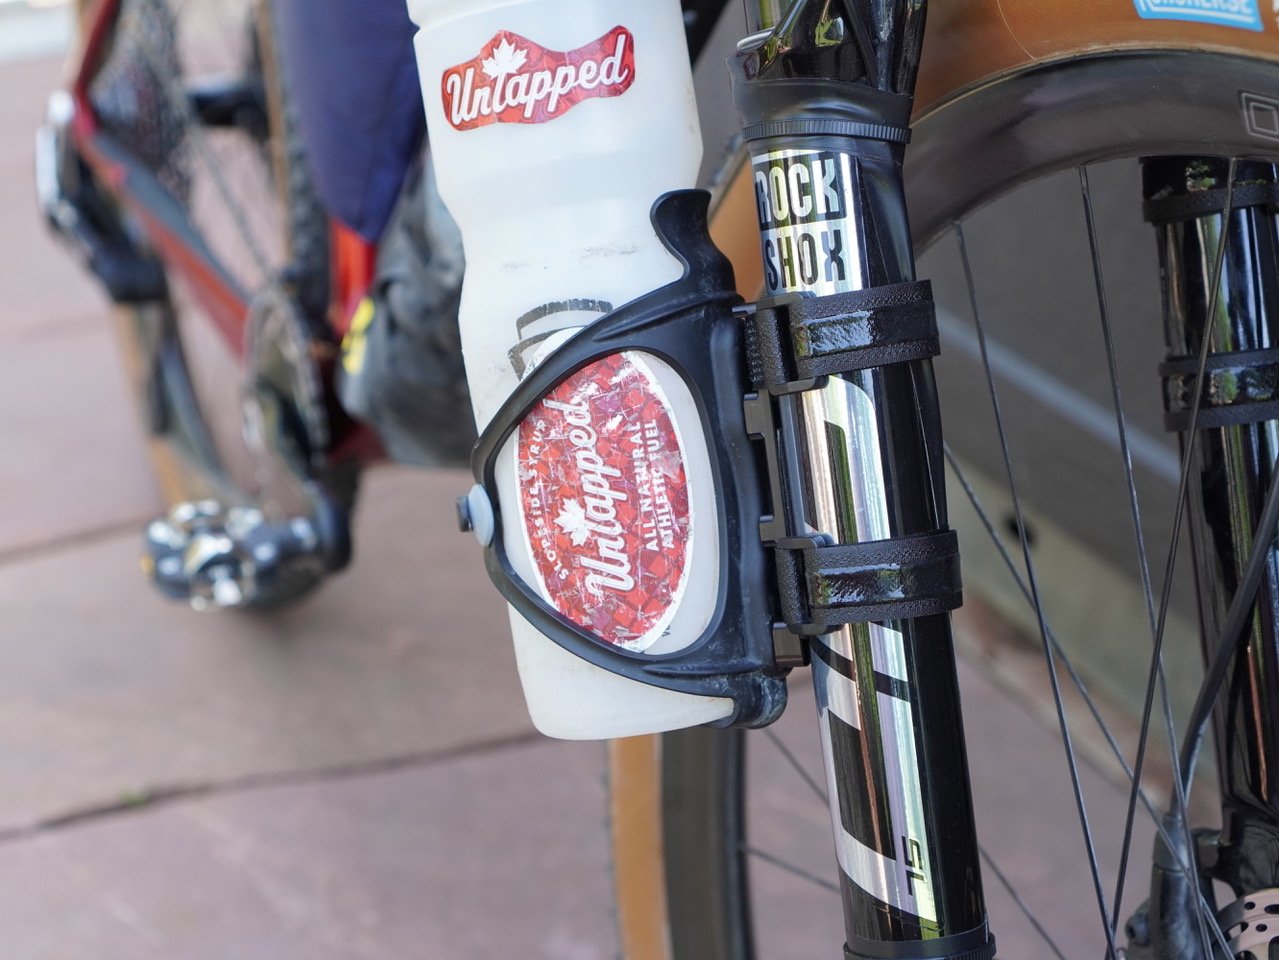
Storing hydration is easier said than done. Bike-bags will steal traditional space in the front triangle and you therefore need to create more space. I opted for Wolftooth’s B-Rad Everywhere Base, on which you can attach lots of accessories, water bottle cages for example. I strapped these bases and cages to my fork with mixed results. The straps have a terrific gummy surface that grip really well. However, when you pull tightly on the straps day after day, they will eventually snap where the eye holes are sewn into them. At which point, Voile straps are key. For what it’s worth, one tugs on the original straps day after day because you’ll accumulate mud, sand, and water in such a way that the stickiness that keeps the B-Rad in place is rendered… less sticky.
Arundel makes the best water bottle cages, full stop. On one fork leg I had the Bando, which is the go-to cage when you never want to lose a bottle. On the other leg, I had a STR which allows you to access the bottle from a different angle than directly from above. As I suggested in the previous paragraph, it was actually a disadvantage to have the grip strength of the Bando because it ended up wiggling the B-Rad straps around on the fork when pushing a bottle in and pulling it out. Furthermore the jarring descents of the Rocky Mountains are enough to sometimes eject a bottle with the slightly less tight STR given the location on the fork, as opposed to a traditional frame positioning.
This is all to say, I don’t know how I would do bottle cages again; maybe I would find more room inside a bag and rig up a hose/hydration bladder system. Or maybe I’d make sure I have bolt eye-holes on the frame/fork in which to screw bottle cages. Except that wouldn’t work with my preferred setup because I’m not aware of a suspension fork that has eye-holes and riding Tour Divide it on a rigid fork is masochistic. Hydration remains a conundrum for the 140-mile stretches without services. Normal day to day riding is fine because there are frequent watering holes, but the long haul stuff is tough. Plenty of riders had hydration packs; I did not.